


Pinning with Margaret: DIY hex nut bracelet
April 27, 2017
This inexpensive accessory will help enhance any outfit. The items for this DIY bracelet can be found laying around the house or even in a junk drawer. All it takes is a few simple tools and some patience.
Here is what you need:
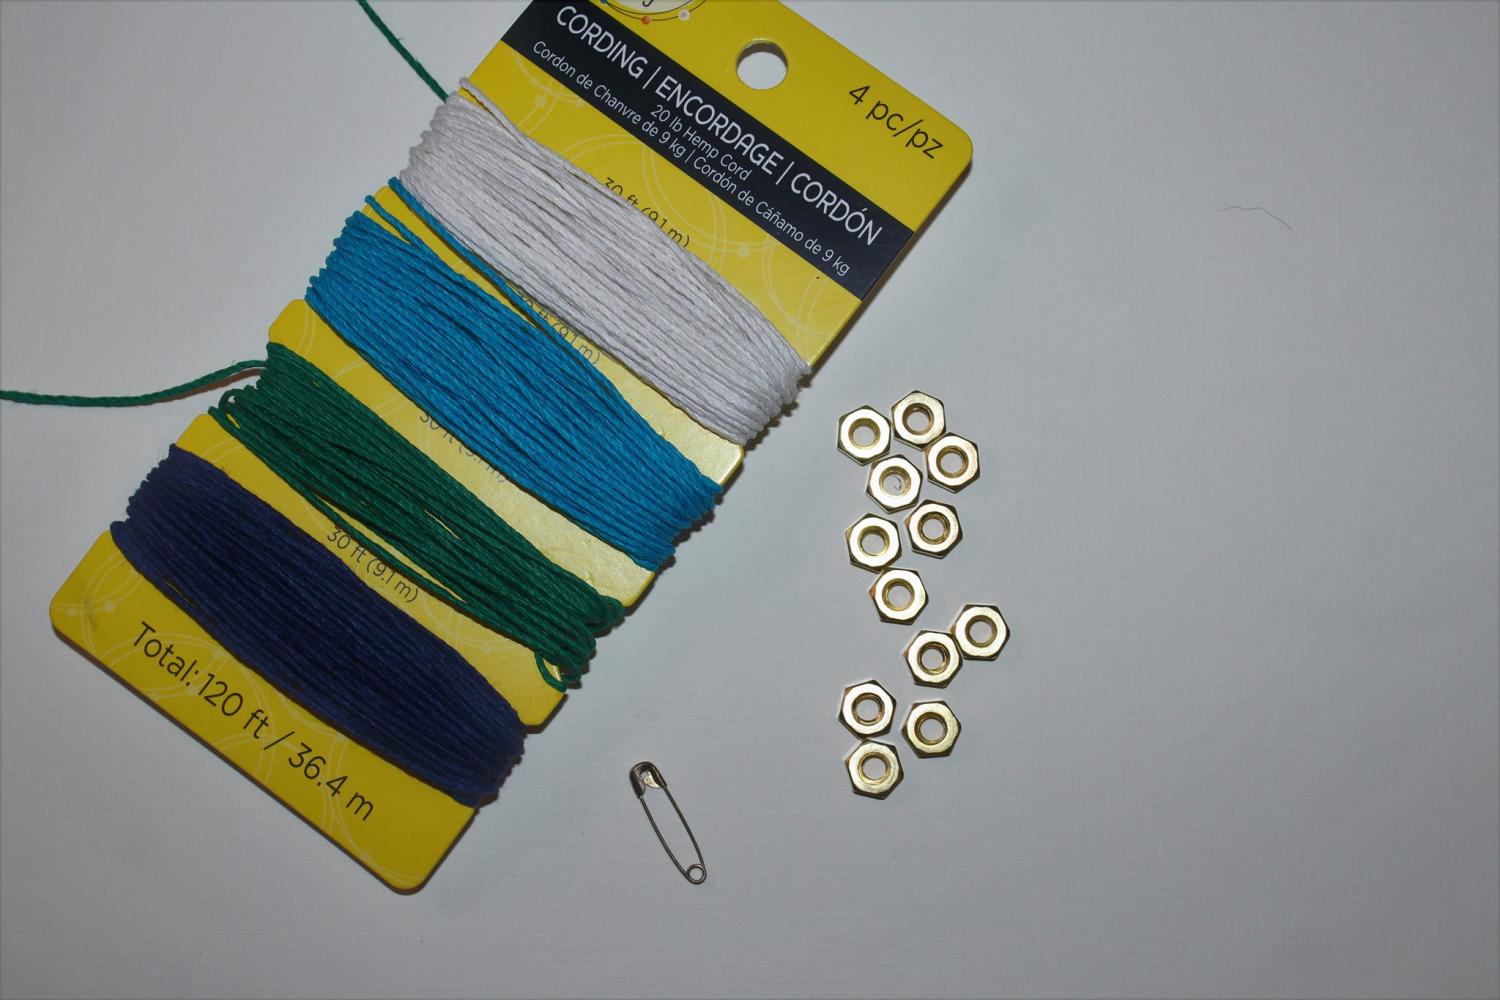
String
Hex nuts
Scissors
Safety pin
First, cut the string for the bracelet to the length appropriate for the person wearing it. Usually about 36 inches is a good length and gives room to adjust the size of the bracelet. Cut three strands of string and fold over to loop at the top. The loop should be able to fit your pointer finger inside.
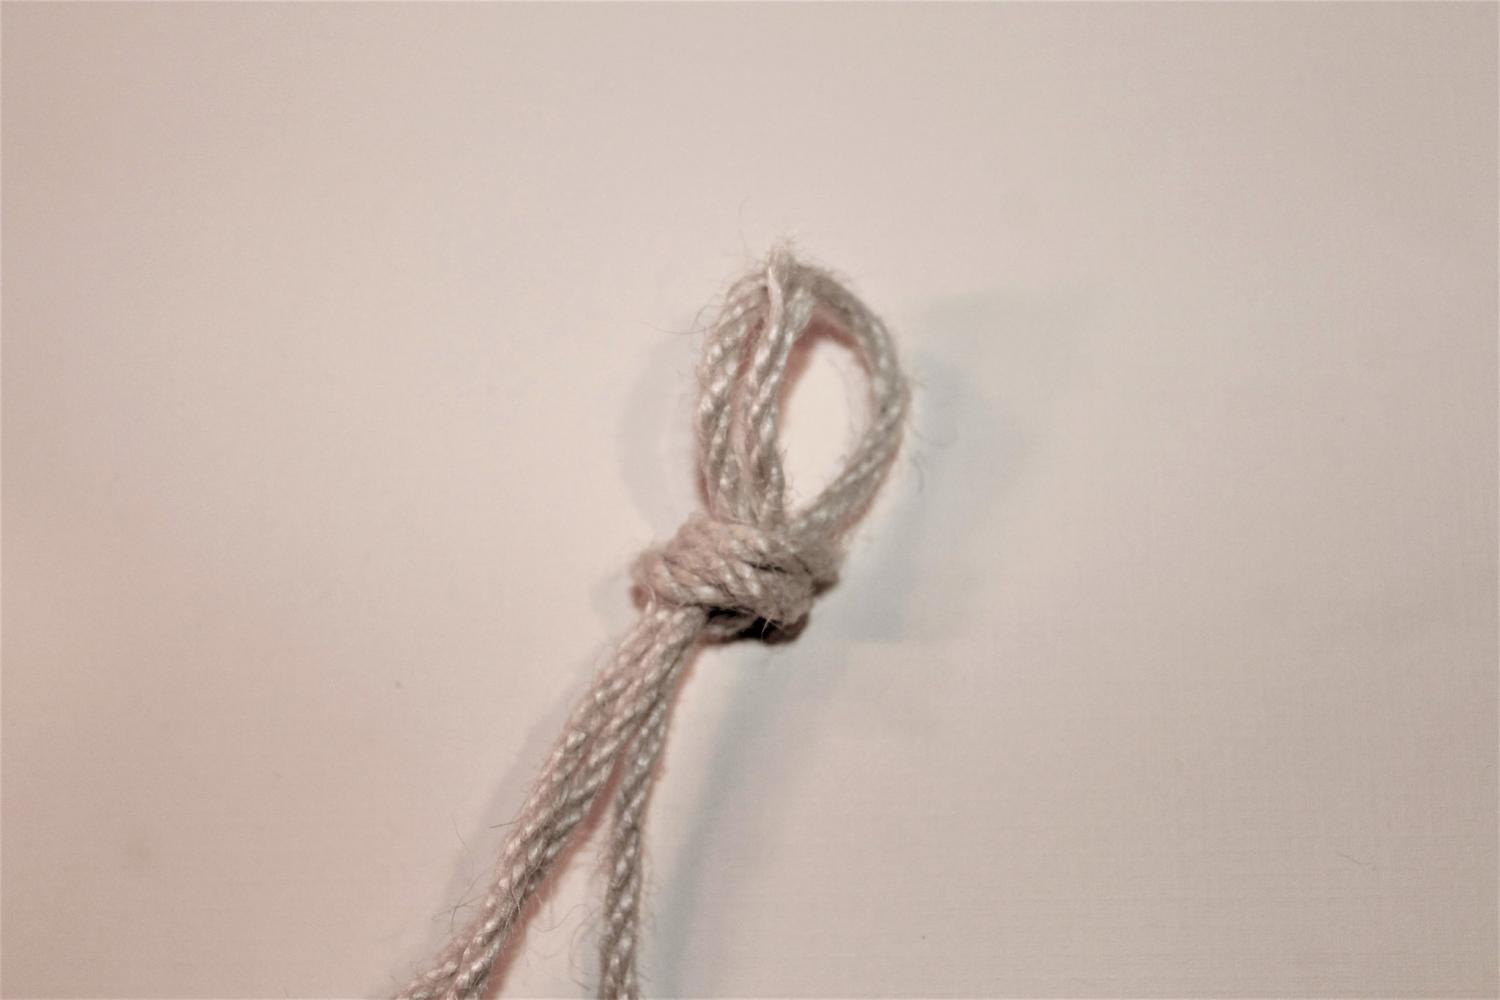
Take the safety pin and secure it through the loop of the bracelet. Pin the bracelet down to a surface such as a blanket or a pillow, so it won’t move during the braiding process.
Start to take each strand of string and simply braid them together. Braid for about one to two inches before taking the first hex nut and looping through the string farthest left. Cross the left string over the middle and then add another hex nut to the farthest string on the right.
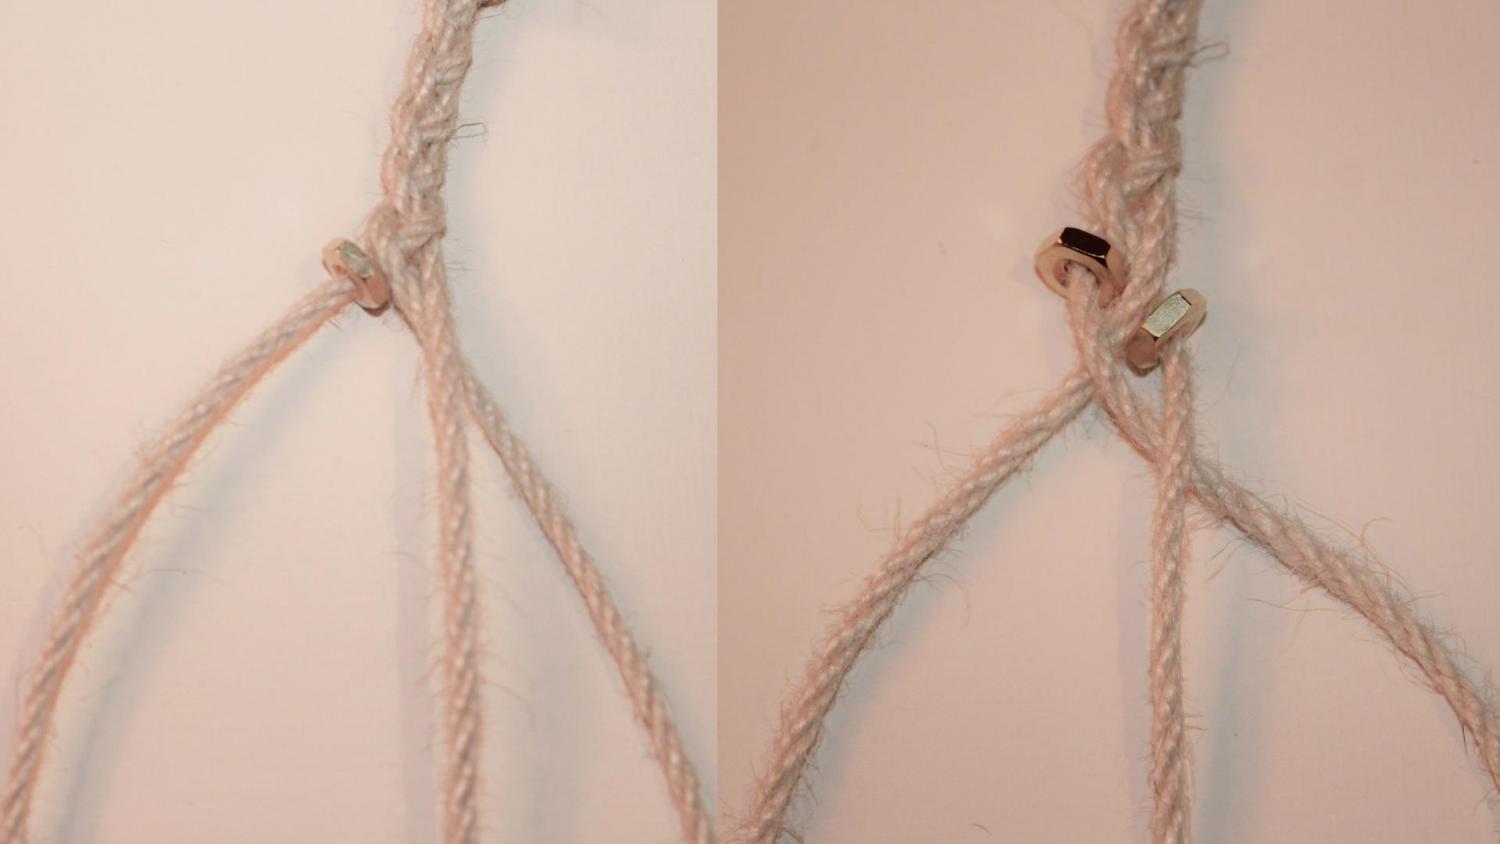
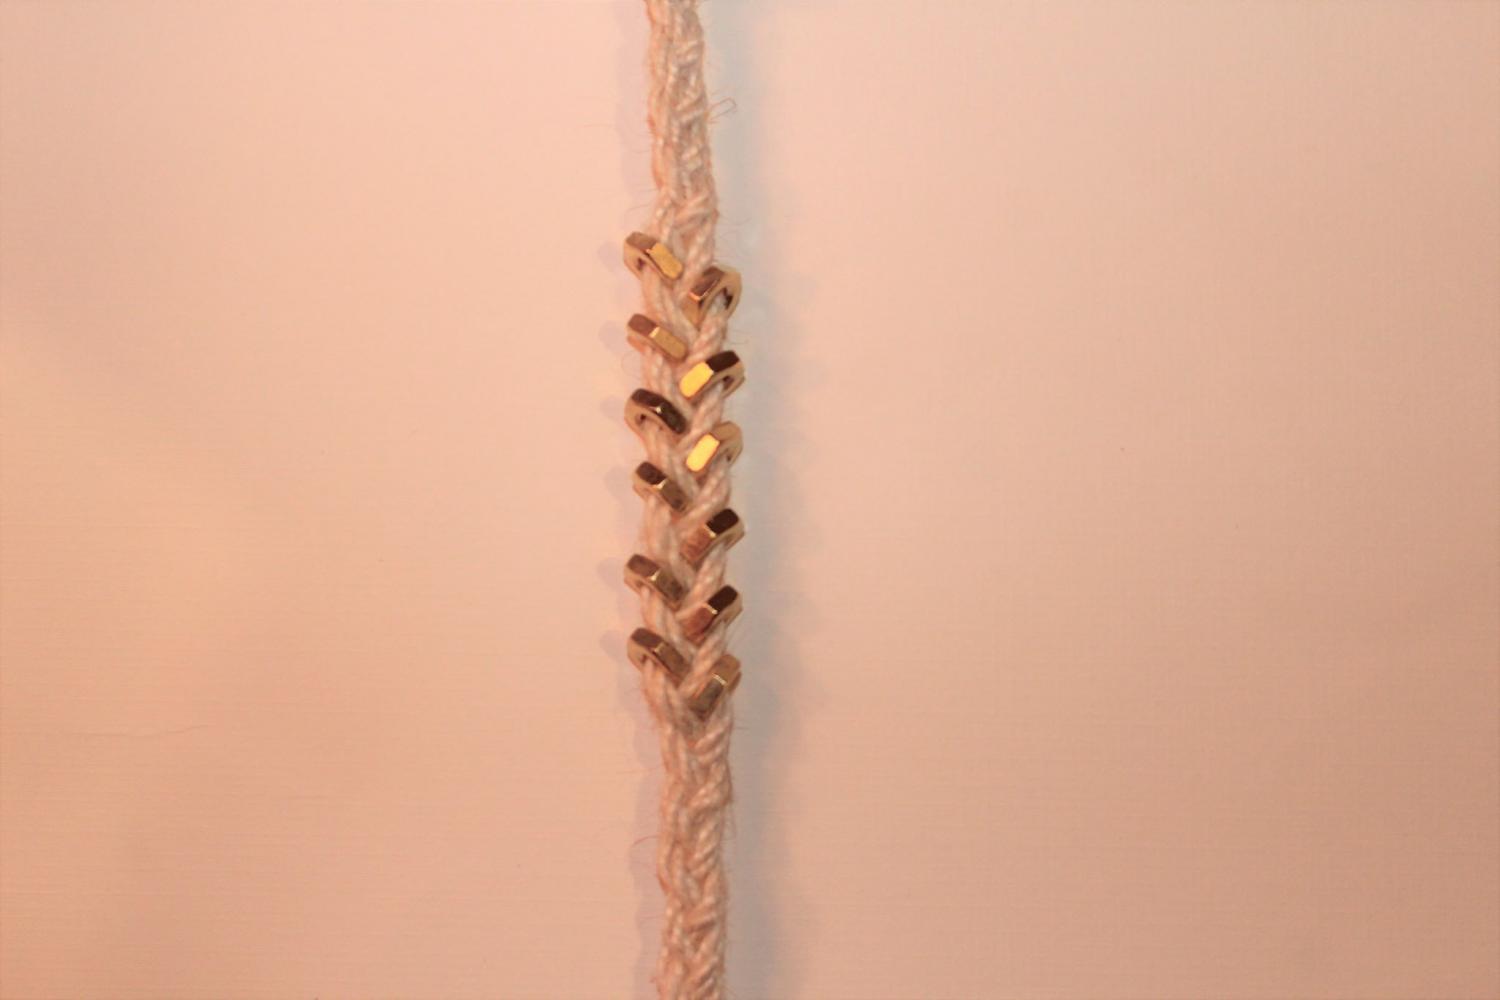
Repeat these steps and add however many hex nuts desired. Thread at least seven or eight rows of hex nuts to really make the bracelet stand out.
After threading all the hex nuts in, continue to braid normally to make the pattern match the beginning of the bracelet. Once at the appropriate length, tie a knot to finish the bracelet off. Use the loop created in the beginning to easily slip the bracelet on and off.
There you have it! This bracelet will add an edge to any outfit for virtually almost no cost. Make multiple bracelets and be creative! Switch out colors of the string, or switch the hex nuts from gold to black, or even silver or copper.
Contact the writer: [email protected]