

Pinning with Margaret: DIY Wall Art
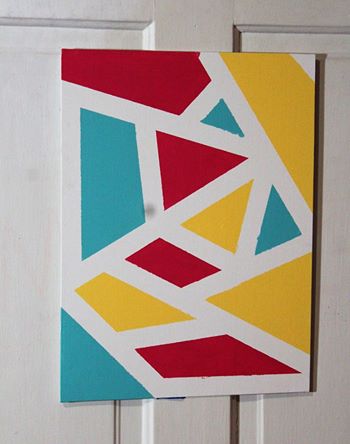
Photo credit/ Margaret Scott
January 29, 2017
Looking for a pop of color in a dorm or apartment? Bring a bold touch to your home with this easy DIY wall art.
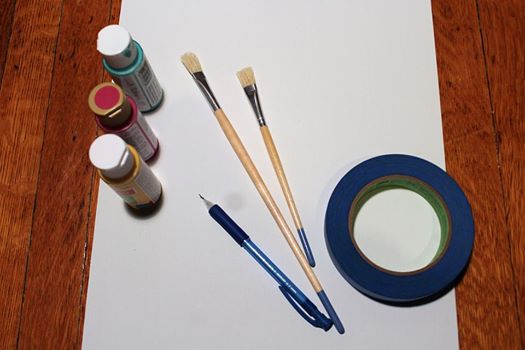
What you need:
-pencil
-paint brush
-acrylic paint
-masking tape
-canvas (size of your choice)
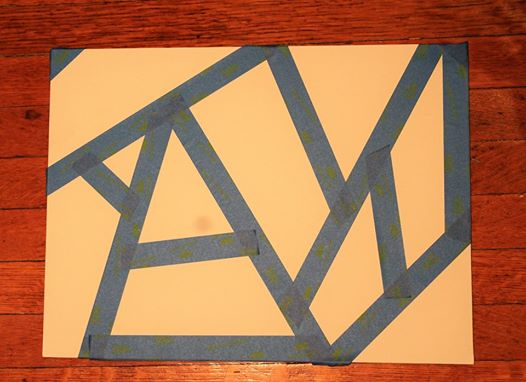
First, lay the canvas on a flat surface. Start to think of places where you want to use the masking tape. The masking tape will cover areas of the canvas where no paint will be placed. Sketch with a pencil where you want these areas to be. Be as creative or as simple as possible, but keep in mind that there will be no color where the tape is placed.
Next, take the masking tape and place it along the lines drawn on the canvas. There are no rules here- the tape can be placed in a random pattern.
Once the tape is placed, start to gather the paint. Choose colors that pop out on the canvas, or a color that will go well in the room where you plan on placing the artwork. After organizing the paint, use the paintbrush to cover all parts of the canvas where there is no masking tape.
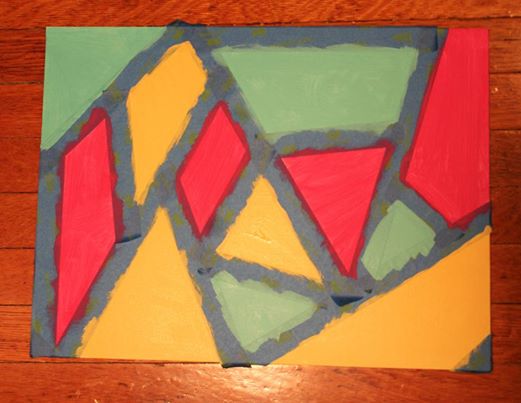
Let the painting sit to dry for about 45 minutes to one hour. Once it’s dry, begin to carefully remove the masking tape.
Now you have a perfect piece of art to tie any room together. This wall art is easy, simple and will make any area in a home stand out!
Contact the writer:
[email protected]