
Pinning with Margaret: DIY watercolor pillowcase
March 9, 2017
As the warm weather approaches and spring cleaning begins, consider revamping a living room or bedroom with this DIY watercolor pillow case. The materials needed most likely can be found right in your home.
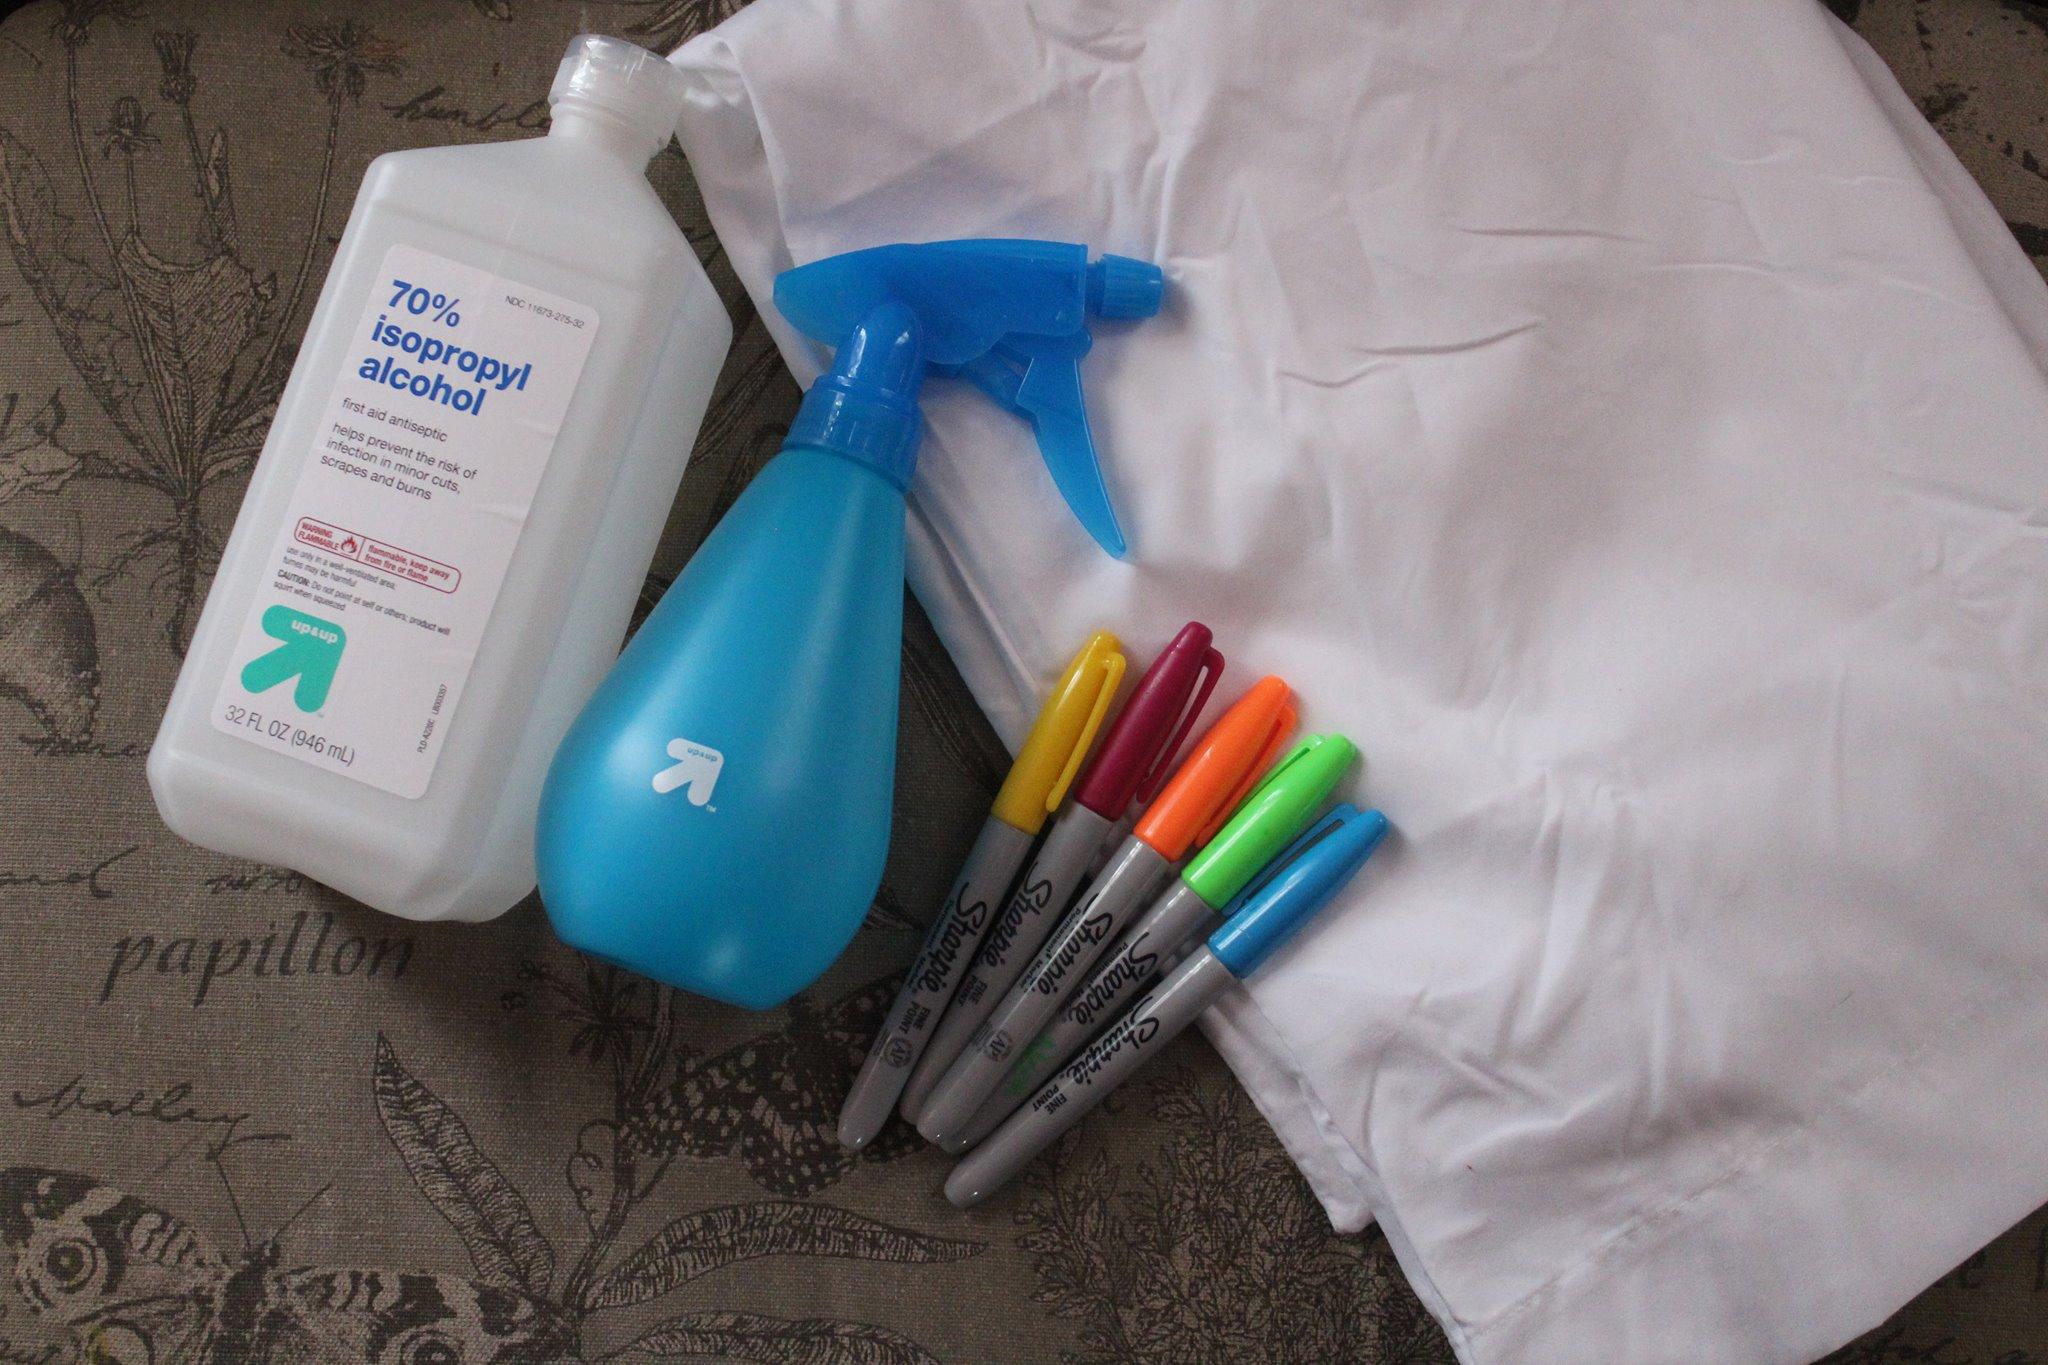
What you’ll need:
-white pillow case
-spray bottle
-sharpies
-rubbing alcohol
-cotton swabs
Before getting started, make sure the pillow case fits the pillow that it will be covering.
Next, take the pillowcase and place it on a flat surface. This will make it easier to color a pattern. Tape down the edges of the pillowcase to the surface to make it easier to draw on the fabric.
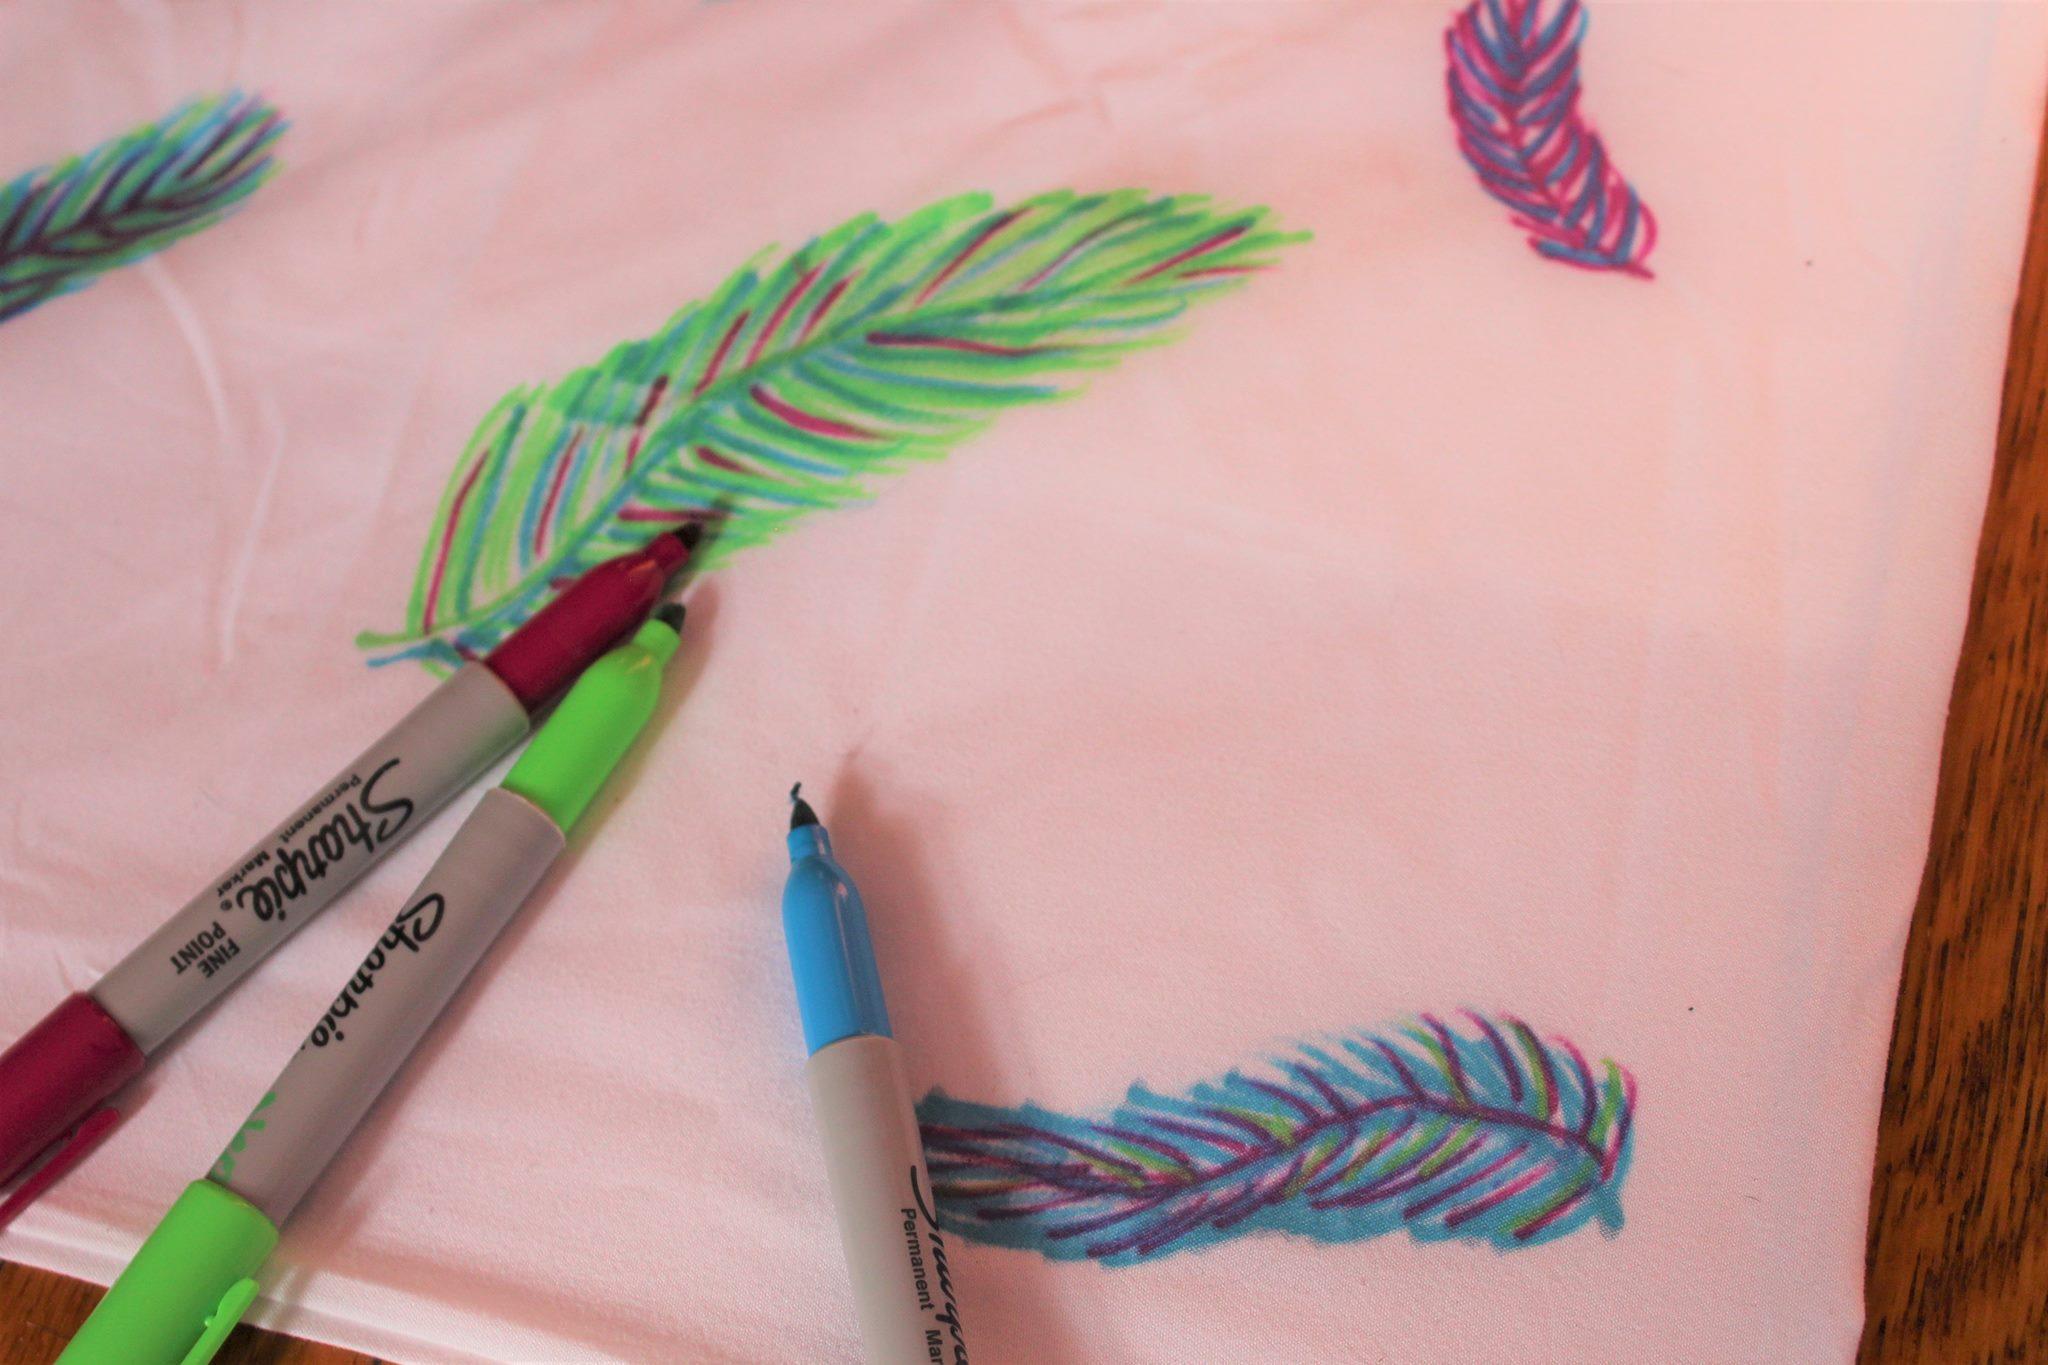
Map out the desired pattern in pencil before using the sharpies. Thick rows of color, small designs and shapes are best. For the watercolor effect to work, make sure to scribble any lines close together and use a variety of colors!
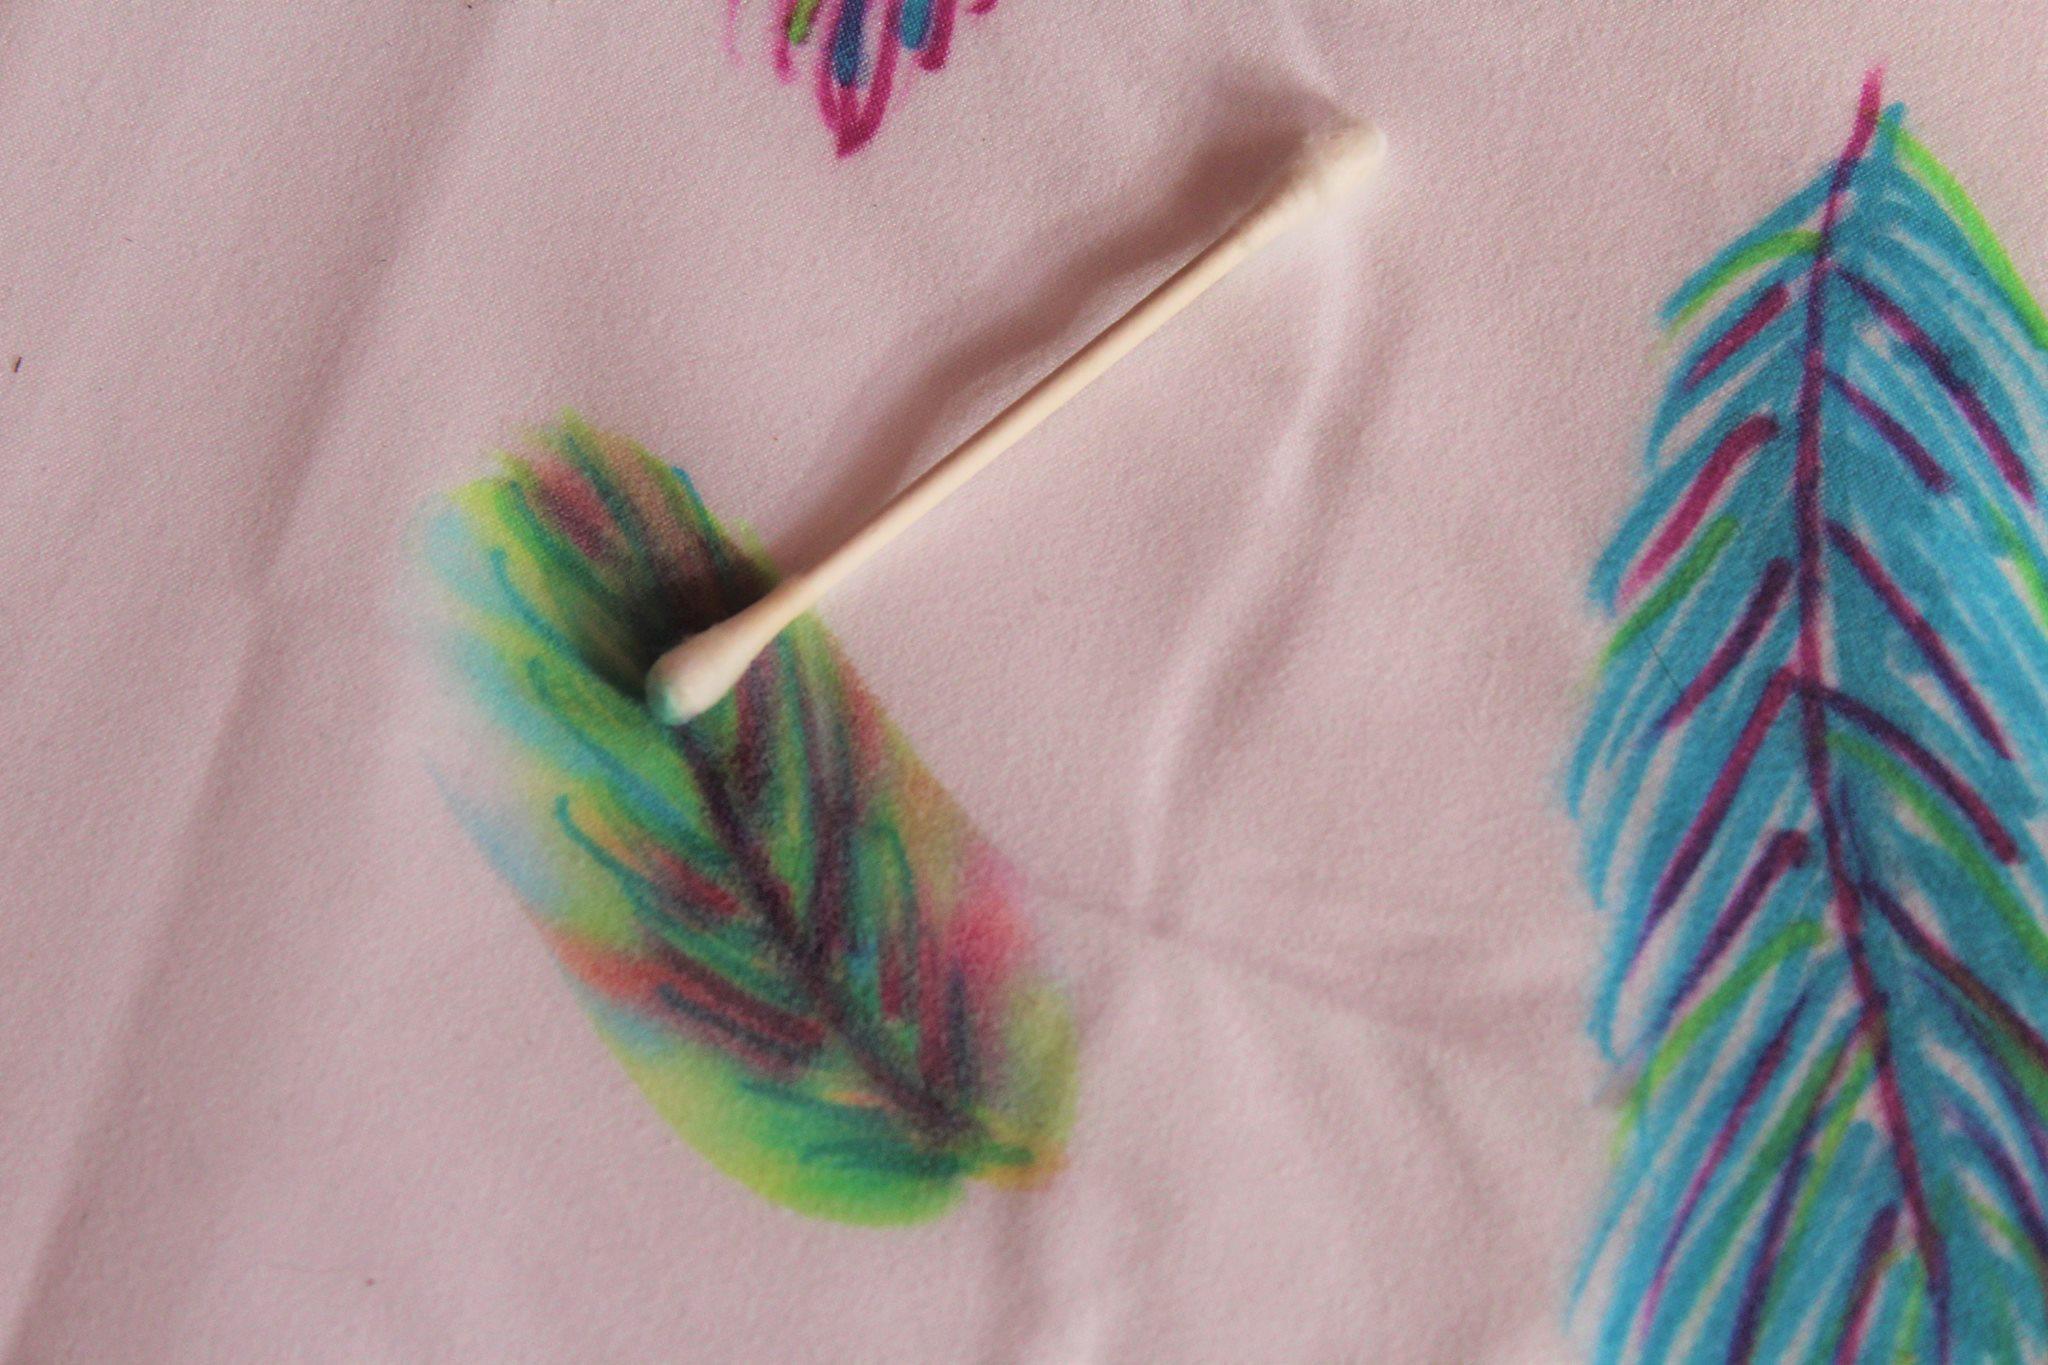
Once the coloring is complete, go into a well-ventilated room and begin to use the rubbing alcohol. If the designs on the pillow case are smaller, dip the top of a cotton swab in the rubbing alcohol and slowly run it over the sharpie. This will act as a paint brush and blend the pattern together, almost like watercolors.
If there are thick rows of color on the pillow case, take the spray bottle and fill it halfway with rubbing alcohol. The effect works best if the pillow case is hanging while being sprayed, so if possible, hang on a towel rack. Spray the pillow case until the colors begin to run, giving it the watercolor effect.
Let the pillow case dry outside for two hours, before placing the case over the actual pillow.
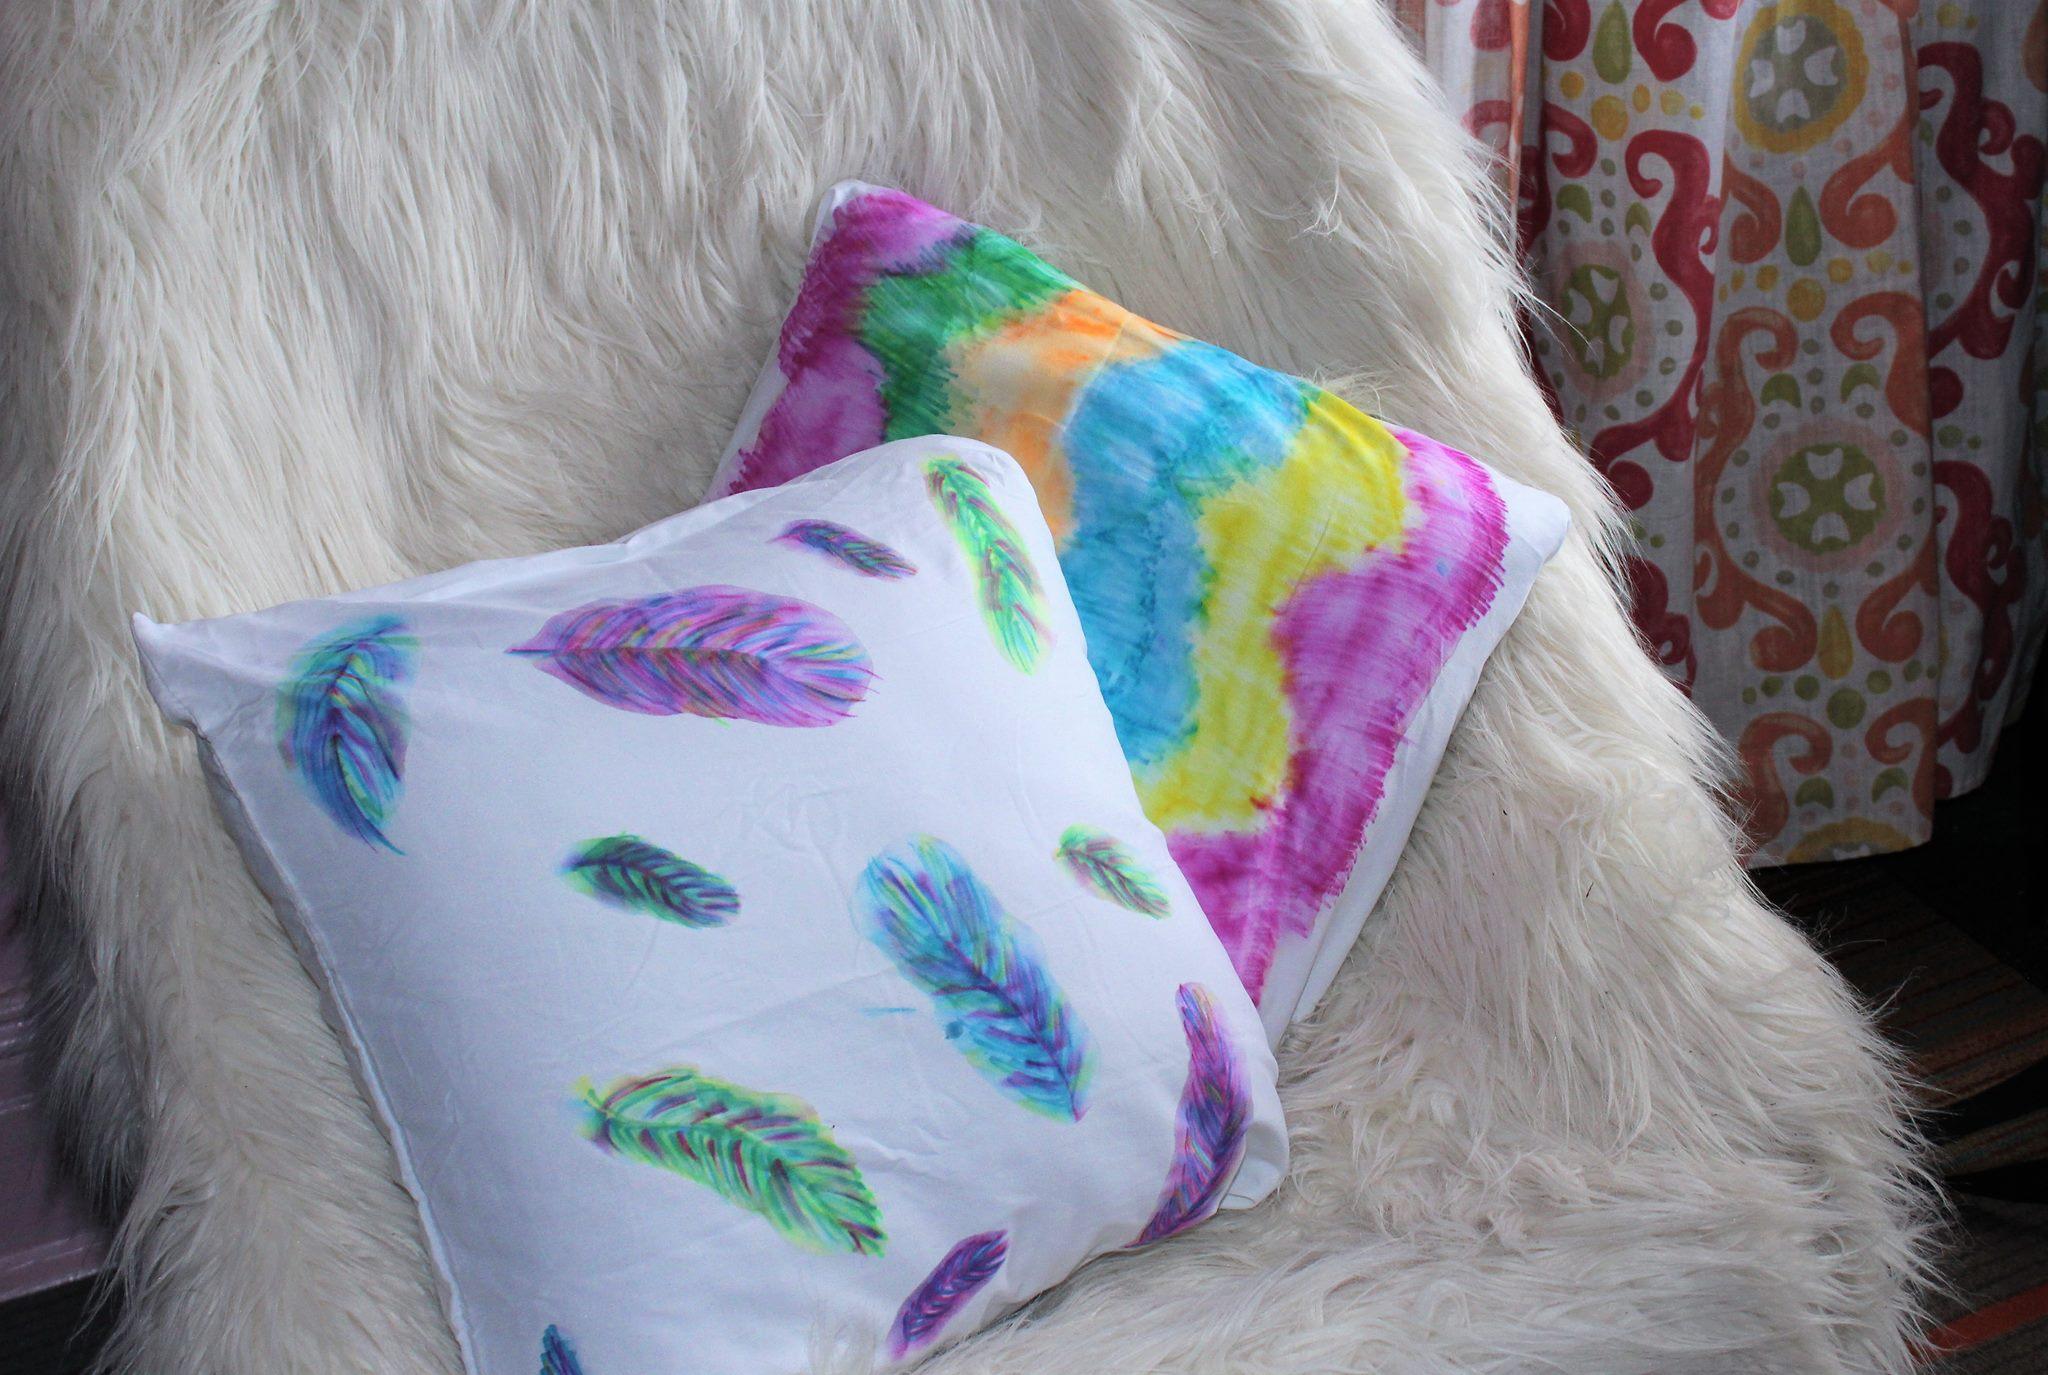
There you have it! This will make a perfect addition to any room that may need a pop of color just in time for spring.
Contact the writer: [email protected]